Friday, November 29, 2024

Roasting a Turkey in a Roaster

ingredients

  • Take the insert pan out of the roaster and pre-heat the roaster to its highest setting. On mine it's 450, but use 500 if your oven goes that high.
  • Do not wash the turkey! The USDA says that washing it could cause a spread of salmonella poisoning. Sprinkle salt in the cavities. Stuff if desired. Don’t pre-stuff your turkey; mix and stuff ingredients immediately before roasting. Tossing in a few pieces of cut fruit or herbs is not considered 'stuffing.' Stuffing usually means filling up the cavity with about ¾ cup stuffing per pound of turkey.
  • Rub the entire bird with olive oil or butter. Doctor up your bird with whatever special seasonings you wish. I always use poultry seasoning. Finish with a good sprinkle of seasoning salt and black pepper.
  • I highly recommend using a wired thermometer so you can watch the temperature without lifting the lid. Your turkey will be done much earlier than the estimated cook time, so keep a sharp eye on that thermometer. If using a pop-up turkey plug type thermometer, those little pop-ups stick sometimes so you should really use two of them.
  • Put the rack into the insert pan and make sure the handles are up, not tucked below. Put the bird in the insert pan on top of the rack. Don’t add water to the pan. Put the insert pan back into the roasting pan. If your roaster doesn't have an insert pan, it's ok - just be very careful putting the bird into that hot oven, you don't want to burn your hands on the sides of the oven! Cover.
  • Roast at highest setting for 30 minutes. The butter/oil, seasonings and the searing time will make the skin beautifully browned and perfect!
  • After 30 minutes, turn the oven temperature down to 325.
  • The turkey will self-baste if you do not lift the lid, so you don't have to baste it every 20 minutes like you do in your conventional oven. DO NOT LIFT LID during cooking time! Lifting the lid will increase cooking time because roaster ovens lose their heat unlike regular ovens. I've read that roaster ovens effectively 'steam' the turkey making the meat come out -- well, steamed. This is not true as you will find out. Similar to the roasted chickens you can get at your supermarket, the bird will come out moist and perfectly roasted. Why do you think they call it a Roaster Oven?.
  • Figure your total cooking time from the time you first put the bird in the roaster. The Butterball website has a great calculator:

  • http://www.butterball.com/calculators-and-conversions.
  • FINAL TEMPERATURE FOR SAFETY AND DONENESS IS: 180 DEGREES IN THIGH AND 165 DEGREES IN BREAST AND STUFFING. Juices should be clear, not pink.
  • Check your turkey EARLY. Really start watching the temp an hour before it's supposed to be done. Your turkey will almost certainly be done before the suggested cooking time. Watch your wired meat thermometer. If using a pop-up turkey plug type thermometer, check by lifting the lid quickly so the oven doesn’t lose its heat. If necessary, check after another 30 minutes, but I doubt you'll have to do that. I say check after 30 minutes because it's really OK to let the bird roast a little extra - you won't dry it out using my method if you let it go for 1/2 hour.
  • When done, remove the turkey from the roaster, tent with foil, and let rest for 20 minutes. This allows the juices to really seep into the meat, so they say.

Saturday, November 23, 2024

Kristie's Green Bean Casserole


Ingredients:

2 T butter

3 T flour

1/4 salt

1/4 t pepper

1 c sour cream

6 oz grated swiss cheese

3 cans French style green beans

1 can french onion rings


Instructions:

1- In a sauce pan, mix butter, flour, salt and pepper until well blended. 

2-Add sour cream. Warm up, but don't boil. 

3- Add swiss cheese. Remove from heat and stir until cheese is melted. 

4- Place drained beans in 9x13 pan. 

5- Gently stir in sauce. 

6- Bake at 350 for 20 mintes. 

7- Top with onion rings. Return to oven for 5 more minutes. 

Libby's New Pumpkin Pie Recipe


(Recipe and picture from here.

Ingredients
 

Instructions

  • 1- Preheat oven to 425F.
  • 2- Whisk eggs well in a large bowl, making sure to get them all well broken up. Whisk in the pumpkin, both milks, salt, and spices. Mix until everything is completely combined.
  • 3- Pour mixture into an unbaked pie crust and place on a baking sheet to make transferring to the oven easier. 4- Bake for 15 minutes, then turn the oven down to 350F and bake for another 30-40 minutes, or until slightly puffed and set around the edges. 
  • Note: See my notes in the post about how to know when your pie is done. Mine took longer than Libby's states, so don't be surprised if yours does too.
  •  5- Cool the pie on a rack for 2 hours before attempting to slice. If you aren't serving the pie after 2 hours, then refrigerate, loosely covered.

Friday, May 31, 2024

Creami Vanilla Ice Cream


Ingredients:

4 TBS instant vanilla pudding mix (I want to try with less pudding mix)
1 1/2 c milk (I used a vanilla Fairlife protein shake)
1/2 c heavy whipping cream
1 tsp vanilla

Instructions:

1. Combined milk and instant pudding mix together. Whisk until pudding dissolves. 
2. Add heavy cream and vanilla and whisk just to combine. 
3. Pour into your creami container and put on the lid. Put in the freezer on a flat surface for 24 hours. 
4. Remove from the freezer and run through the cycle. If it is powdery, add a little bit of milk and run it again. 
5. Add any add ins that you want and run it through the mix-in cycle. Enjoy!

Creami Frosty Copycat


Ingredients:

2 cups chocolate milk (I use Fairlife shakes)
1 Tbs Instant chocolate pudding mix
1/2 vanilla extract

Instructions:

1. Combine chocolate milk and instant chocolate pudding mix. Use whisk or immersion blender to make sure the pudding mix is dissolved. 
2. Add vanilla extract and stir to incorporate. 
3. Pour into the ninja container and close the lid. Place in freezer on a flat surface for 24 hours. 
4. Remove from freezer and run through the Ninja. If it is powdery you can always add a little milk to make it the right consistency and then respin. 
5. Add any ingredients you want and viola!


Sunday, December 4, 2022

White Chocolate Dipped Peppermint Chocolate Cookies


Ingredients

  • 1 2/3 cups (237g) all-purpose flour (scoop and level to measure)
  • 1 cup (98g) unsweetened cocoa powder (scoop and level to measure)
  • 1 tsp baking soda
  • 1/2 tsp salt
  • 1 cup (226g) unsalted butter, softened about halfway (it should be fairly firm still)
  • 1 1/4 cups (250g) granulated sugar
  • 3/4 cup (160g) packed light brown sugar
  • 2 large eggs
  • 2 tsp vanilla extract
  • 1 tsp peppermint extract
  • 16 oz. white chocolate, broken or chopped
  • 1/4 cup (approx) finely crushed peppermint bits (I used the King Leo ones)

    Instructions

    • Preheat oven to 350 degrees. Line baking sheets with silicone liners or parchment paper.
    • In a medium mixing bowl whisk together flour, cocoa powder, baking soda and salt for 20 seconds. Set aside.
    • In the bowl of an electric stand mixer fitted with the paddle attachment cream together butter, granulated sugar and brown sugar until well combined. 
    • Mix in eggs one at a time then blend in vanilla extract and peppermint extract.
    • With mixer set on low speed slowly add in flour mixture and mix just until combined.
    • Scoop dough out by a rounded tablespoon (about 25 grams each) and shape into balls (if dough is sticky you can chill as needed but mine wasn't sticky at all).
    • Space on cookies sheets 2-inches apart. Flatten cookies slightly. 
    • Bake one sheet at a time in preheated oven about 8 minutes (cookies should appear slightly under-baked). 
    • Let cool on baking sheet several minutes then transfer to a wire rack to cool 5 minutes then transfer to an airtight container to fully cool. 
    • Once cookies are cool, melt white chocolate in a microwave safe bowl on 50% power in 30 second increments, stirring between intervals until melted and smooth. 
    • Dip half of each cookie in white chocolate then transfer to parchment paper and sprinkle with peppermint bits. Chill to let chocolate set about 10 minutes. 
    • Store cookies in an airtight container.
  • Thursday, December 1, 2022

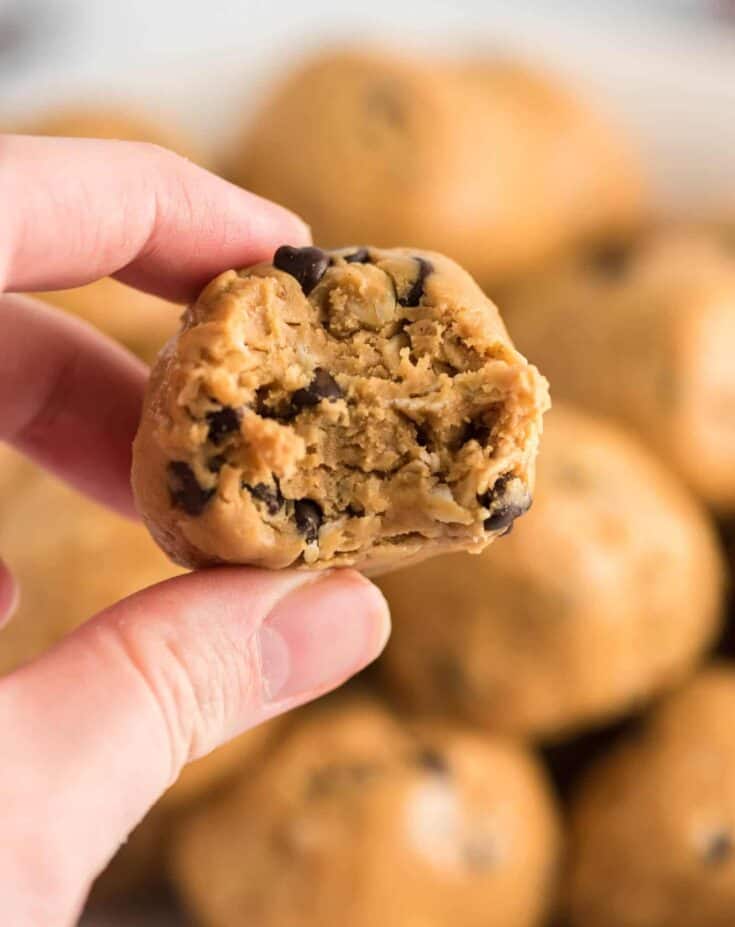
    Yummy Protein Balls


    Ingredients

    • 1 ½ cups no stir creamy peanut butter
    • ½ cup honey
    • 1 ⅓ cups old fashioned oats (rolled oats)
    • ½ cup vanilla protein powder
    • ⅛ teaspoon salt
    • ½ cup mini dark chocolate chips

    Instructions:
    1. Add the no stir creamy peanut butter, honey, rolled oats, vanilla protein powder, salt, and mini dark chocolate chips to a mixing bowl and use a rubber spatula to mix until the batter is combined
    2. Use a mini cookie scoop or a spoon to drop energy balls with a spoon onto a wax paper covered cookie sheet. They should be around 1 inch in size.
    3. Roll the energy balls with your hands to form the shape
    4. Place cookie sheet with the energy bites on it in the fridge for 1 hour, or until the balls are hardened
    5. Transfer energy balls to a ziploc bag and store in the freezer